As seen earlier, maxing out memory and adding a dedicated video card only produced an approximate 10% performance increase. I wanted to see just how good the NVIDIA GeForce MX440 AGP card was so I went to the Passmark software site at http://www.videocardbenchmark.net/low_end_gpus.html to compare low end video cards. I discovered that the MX440 card was really low end, scoring only a 4. I looked around for some better cards realizing I had a double handicap. First, the video slot on the GX 270 SFF was AGP and second, only a half height card would fit in the SFF case. This eliminated a LOT of cards. Looking on eBay eliminated a lot more. Eventually I found a Radeon X1300 that was AGP and half height. I got it cheap and if it works I should get a big graphics boost as it it much faster than the MX 440 - see the test page at http://www.videocardbenchmark.net/gpu.php?gpu=Radeon+X1300 where it scored a 57!
Here is a pic:
I'm going to put it in the GX 270, swapping out the NVIDIA card, and hope I don't have driver problems.
Friday, June 10, 2016
Tuning and Benchmarking a Dell GX270 SFF P4 - Recap
I removed the NVIDIA card and ran the benchmarks on a config with 2 MB of RAM. It scored a 86.6.
Here is the detail:
I then reran the tests on the config with the NVIDIA GeForce MX440 with 2 MB of RAM and got a new score of 92.7.
The detailed benchmark is this:
To recap;
86.1 with original config (1 MB RAM, Intel 82865G integrated graphics),
86.8 with 2 MB RAM and the integrated Intel 82865G graphics,
92.6 with 1 MB RAM and a NVIVIA GeForce MX440 AGP video card,
92.7 with 2 MB RAM and a NVIDIA GeForce MX440 AGP video card - about a 10% increase.
Friday, May 6, 2016
Tuning and Benchmarking a Dell GX270 SFF P4 - Part 3
I upgraded memory from 1 GB to the system max of 2 GB expecting a nice performance jump as the easiest upgrade to a PC is to add memory. Nope. The overall performance actually went DOWN.
So, let's look at the individual benchmarks to see what happened.
Overall rating went from 92.6 to 88.3 - a decrease of 4.6%. Hmm. Let's compare individual tests; Prior to memory upgrade CPU Mark of 329.8, after upgrade 328.8 not too much difference there. Prior to upgrade 2D Graphics Mark of 296.1, after upgrade 296.3 again, not to much difference. Prior to upgrade 3D Graphics Mark of 9.3, after 8.8. For some reason adding system memory slowed down the 3D graphics test by 5.4%. Continuing, prior to upgrade Memory Mark of 486.1, after upgrade to 2 GB, 577, an 18.7% increase. Close to what one would expect but not enough to compensate for the slower graphics hit. Finally looking at Disk Mark before 346.4 and after 341.9. Again a slowdown but only about 1.3%.
So I think I will go back, remove the GeForce card and compare the results with a 2 GB system memory upgrade.
So, let's look at the individual benchmarks to see what happened.
Overall rating went from 92.6 to 88.3 - a decrease of 4.6%. Hmm. Let's compare individual tests; Prior to memory upgrade CPU Mark of 329.8, after upgrade 328.8 not too much difference there. Prior to upgrade 2D Graphics Mark of 296.1, after upgrade 296.3 again, not to much difference. Prior to upgrade 3D Graphics Mark of 9.3, after 8.8. For some reason adding system memory slowed down the 3D graphics test by 5.4%. Continuing, prior to upgrade Memory Mark of 486.1, after upgrade to 2 GB, 577, an 18.7% increase. Close to what one would expect but not enough to compensate for the slower graphics hit. Finally looking at Disk Mark before 346.4 and after 341.9. Again a slowdown but only about 1.3%.
So I think I will go back, remove the GeForce card and compare the results with a 2 GB system memory upgrade.
Monday, May 2, 2016
Tuning and Benchmarking a Dell GX270 SFF P4 - part 2
I was going to add additional memory as the first upgrade to the base unit, but the integrated graphics chip bombed the 3D benchmarking test a couple of times so I decided to do a quick video upgrade. I added back the NVIDIA GeForce4 MX440 AGP card and when I rebooted the BIOS automatically recognized the card and overrode the integrated chip. I ran 4 tests and the 3D test showed a 7.5% improvement while the memory test got 4.7% faster probably because the video card has its own memory and doesn't have to share system memory like the integrated chip.
Overall the system performance achieved a 7% speed increase with the video card upgrade.
Next step will be a memory upgrade.
Overall the system performance achieved a 7% speed increase with the video card upgrade.
Next step will be a memory upgrade.
Monday, April 11, 2016
Tuning and Benchmarking a Dell GX270 Pentium 4
This is my first project. Take a classic Pentium 4, in this instance an (in)famous Dell Optiplex GX270 SFF, and see how much better I can make the basic model by installing various upgrades. The GX270 model is infamous for being part of a large production run that had bad capacitors installed and which proceeded to literally blow up. Later, Dell ended up swapping out thousands of motherboards over this issue.
Here is the unit on the workbench. A Dell Optiplex GX270 with CD-DVD drive and a 3 1/2" floppy drive with a couple of front side USB 2.0 ports. These are readily available all over eBay for less than $100.
Here is the unit with the clamshell opened. A pretty nice piece of engineering fitting a lot of stuff in a small space. At this time there is an upgraded video card installed, but I am going to remove it for the base line tests.
Power it up and go to the Bios setup page to check things out. This is equipped with a Pentium 4 running at 3.2 GHz and 1 MB of DDR SDRAM.
The BIOS leaves no options for any kind of overclocking.
The on board graphics is an Intel 82865G chip. It has almost no 3D power and in fact during testing failed the 3D test at least once.
For benchmarking I am using the 32 bit version of the Passmark V8.0 performance test suite. This is the best complete testing suite for PCs and is available for around $20 from Passmark.com. They also publish a huge variety of test results that users post. Very useful and interesting for testing. I ran the full test suite twice successfully and got overall scores of 85.5 and 86.1. Not too impressive but good enough for a baseline.
This is the detail page. Notice the very poor 3D results. Normally the first upgrade would be memory, but I'm going to put the video card back in.
Here is the unit on the workbench. A Dell Optiplex GX270 with CD-DVD drive and a 3 1/2" floppy drive with a couple of front side USB 2.0 ports. These are readily available all over eBay for less than $100.
Here is the unit with the clamshell opened. A pretty nice piece of engineering fitting a lot of stuff in a small space. At this time there is an upgraded video card installed, but I am going to remove it for the base line tests.
Power it up and go to the Bios setup page to check things out. This is equipped with a Pentium 4 running at 3.2 GHz and 1 MB of DDR SDRAM.
The BIOS leaves no options for any kind of overclocking.
The on board graphics is an Intel 82865G chip. It has almost no 3D power and in fact during testing failed the 3D test at least once.
For benchmarking I am using the 32 bit version of the Passmark V8.0 performance test suite. This is the best complete testing suite for PCs and is available for around $20 from Passmark.com. They also publish a huge variety of test results that users post. Very useful and interesting for testing. I ran the full test suite twice successfully and got overall scores of 85.5 and 86.1. Not too impressive but good enough for a baseline.
This is the detail page. Notice the very poor 3D results. Normally the first upgrade would be memory, but I'm going to put the video card back in.
Tuesday, April 5, 2016
Bare Metal PC League
I am going to start a FB page for people who are interested in "tuning up" older and legacy PCs. The page will give them a virtual place to ask questions, show off their projects and compare system specs and benchmarks. Eventually I'd like to even have some competition ladders and/or events. Here's the logo.
Accessing an old IDE HD with a USB Adapter
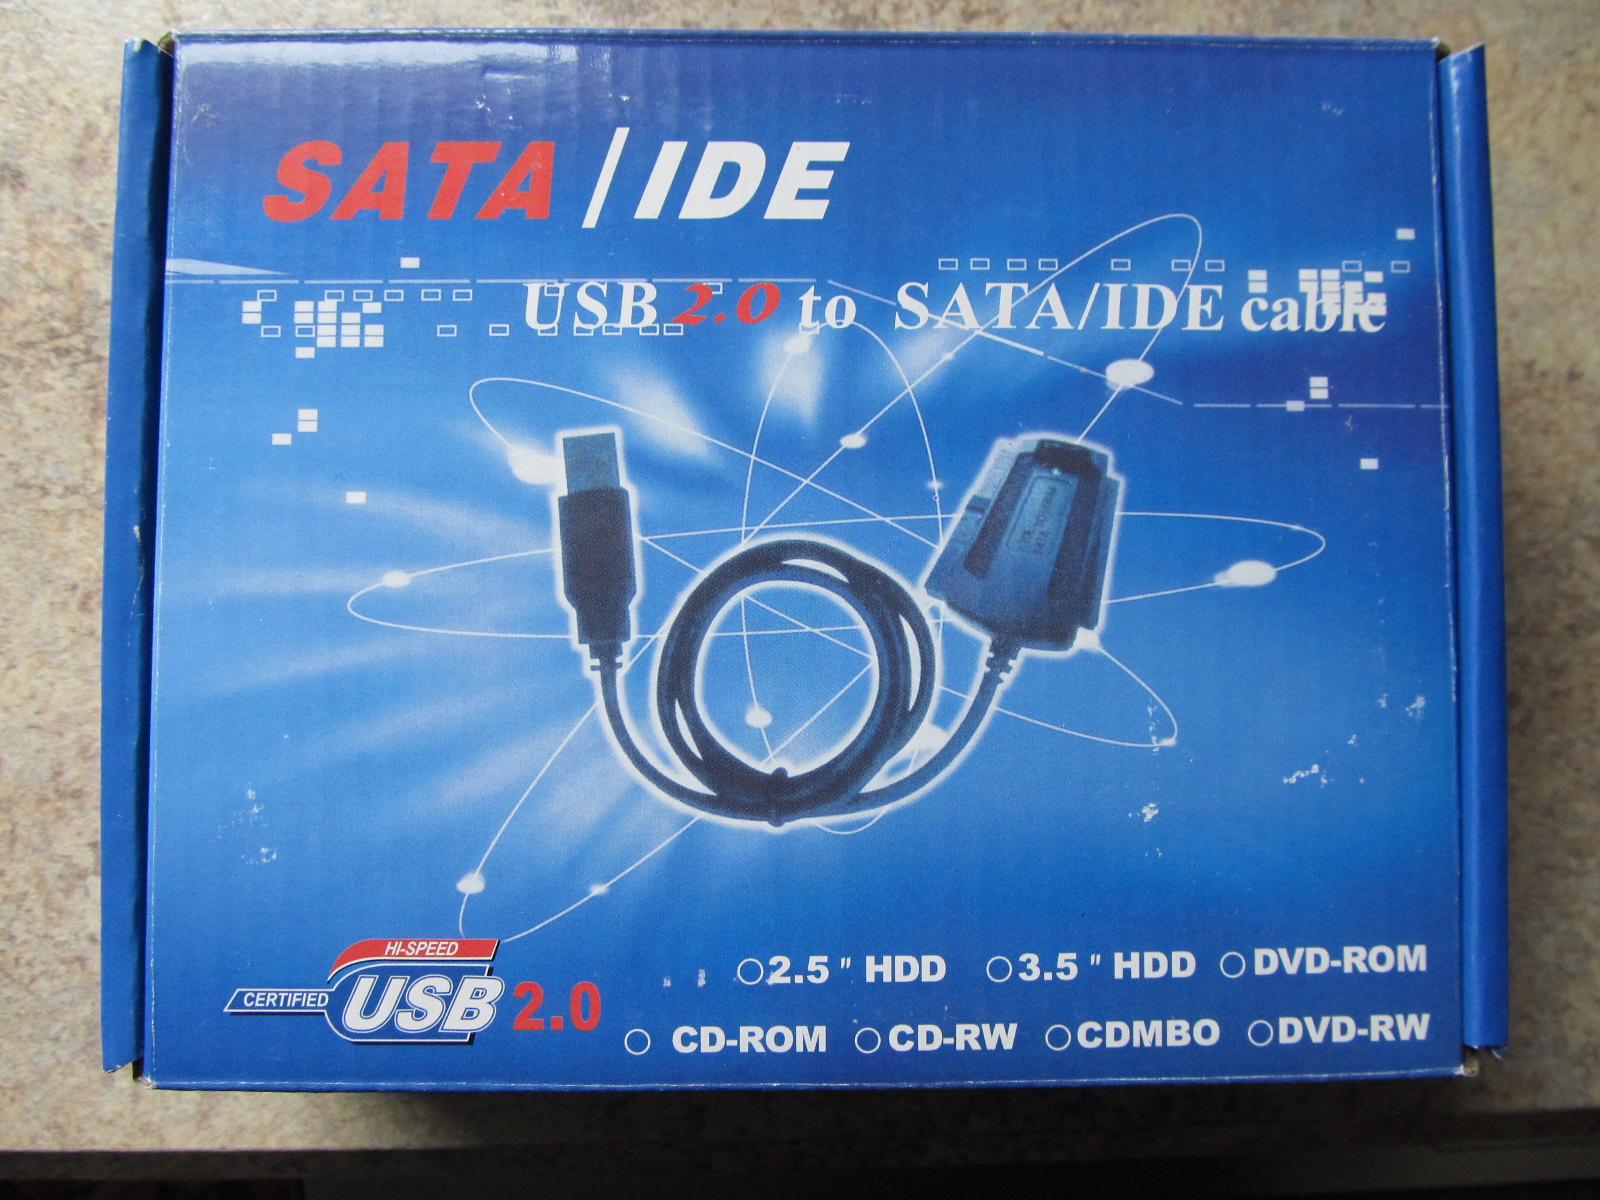
This is a continuation of my last post from 2014 in which I wanted to check for pics on an old IDE HD in a USB enclosure but couldn't get it to power up. I wanted an adapter so I could take a bare IDE drive and convert it to USB. I ended up buying this:
Inside are four pieces, a power cable, a power adapter, a power cord and the IDE/USB adapter pictured on the box cover.
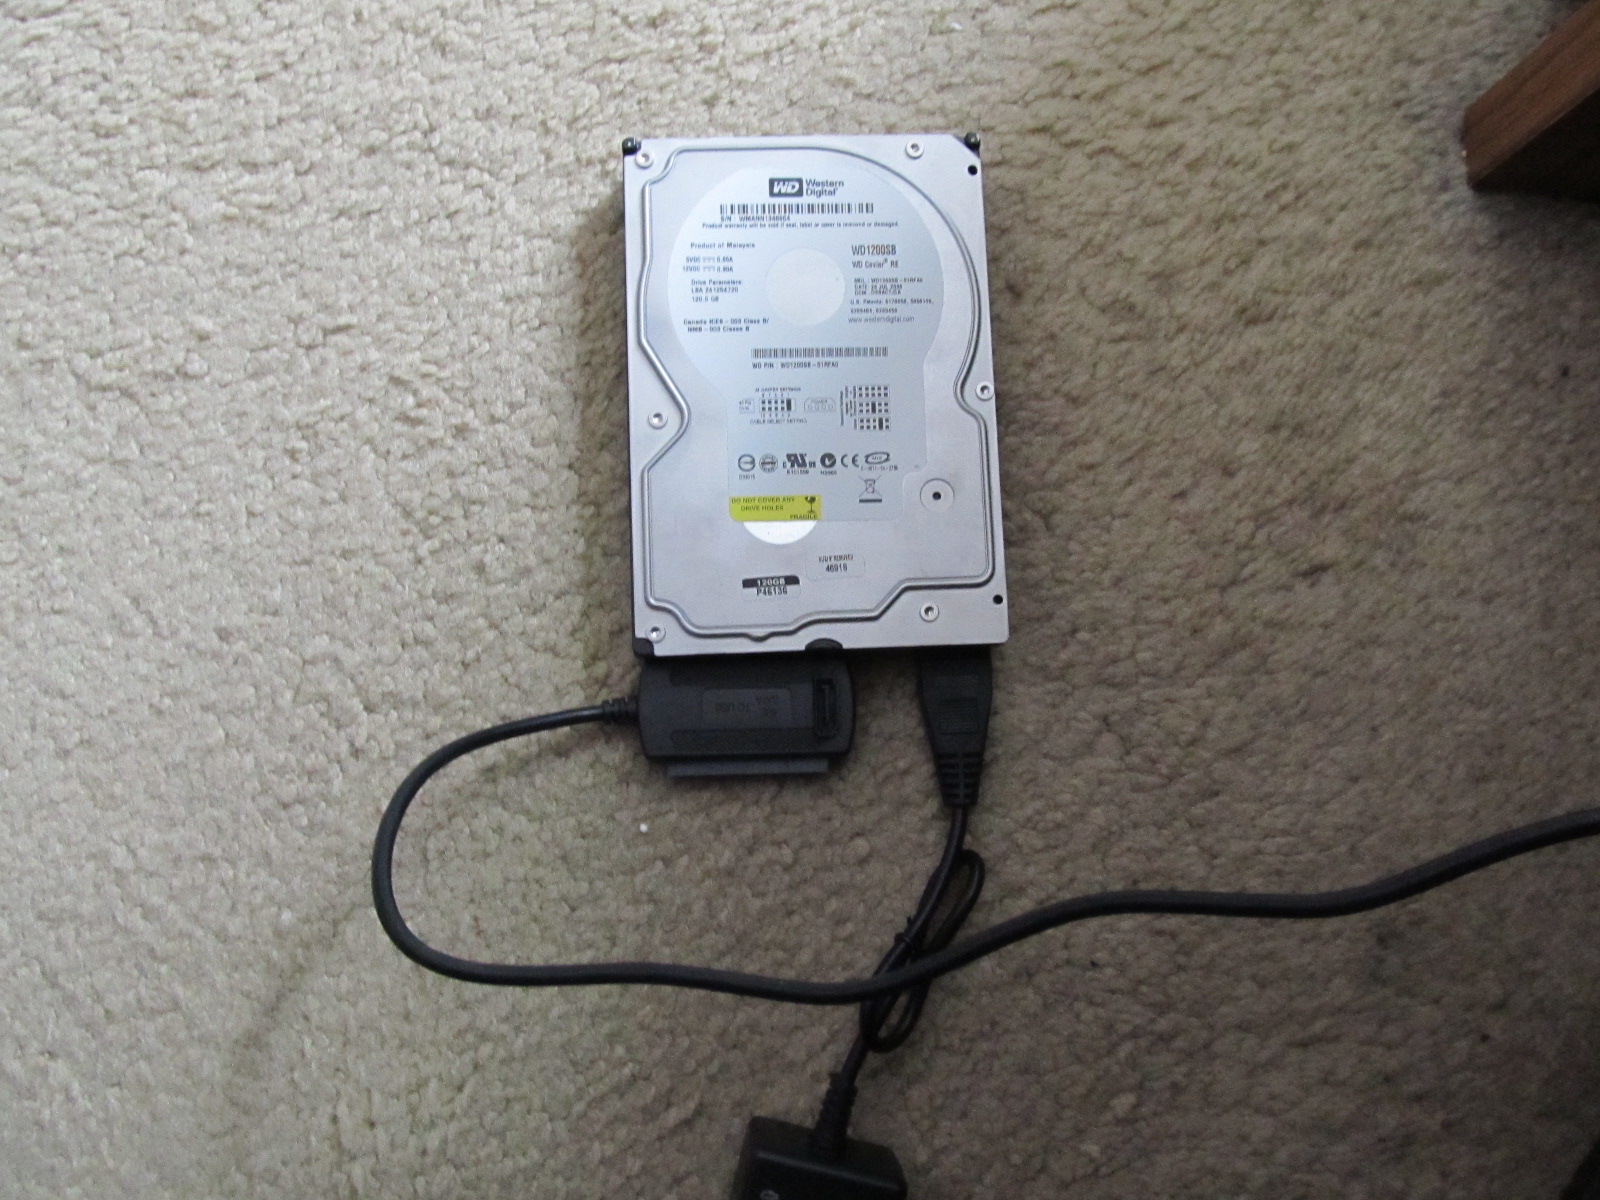
I connected the power cable/transformer to the power connector and the IDE adapter to the IDE pin connector on the drive.
So it looks like this:
Then plugged the power cord into the adapter and the wall outlet and then the USB at the end of the IDE adapter into a port on the PC.
Waited. Got the Windows ping announcing it had noticed a new USB device installed and then went to My Computer and found it as Drive I:
Notice it is seen as a "DiskGo", the original name of the unit. Clicked on OK and saw the directory of files.
Started drilling down into the folders looking for pics. Success!
Inside are four pieces, a power cable, a power adapter, a power cord and the IDE/USB adapter pictured on the box cover.
I connected the power cable/transformer to the power connector and the IDE adapter to the IDE pin connector on the drive.
So it looks like this:
Then plugged the power cord into the adapter and the wall outlet and then the USB at the end of the IDE adapter into a port on the PC.
Waited. Got the Windows ping announcing it had noticed a new USB device installed and then went to My Computer and found it as Drive I:
Notice it is seen as a "DiskGo", the original name of the unit. Clicked on OK and saw the directory of files.
Started drilling down into the folders looking for pics. Success!
Thursday, December 18, 2014
Removing the drive from a DiskGo.
It was old school so besides the USB connection to the computer, it needed a wall connection and a transformer.
I set it all up and switched it on and... it's dead, Jim. So, I decided to see if I could take it apart and get the drive out so I could hook it up to another computer to test it. You can see the itsy bitsy screws holding the cover on so I need some special tools.
You do have a set like this, right? I removed the top cover.
You can see the drive and the custom board it is attached to. It is just a standard drive so I will attempt to remove it from the case. I flipped it over and removed the other two screws.
The drive is held in the case with 4 more screws. I removed them, turned the case over, disconnected the yellow custom cable and, with a small set of vice grips, removed the power connector.
I then put the case back together and added it to my electronics recycling box.
I will test the bare drive later in one of my PCs on the bench.
Thursday, December 4, 2014
Project: eMachines T-3256 restoration (5)
This eMachines model came with an onboard video chip - the NVIDIA nForce2, but the previous owner had upgraded to a nvidia GeForce 4 card. Here's a pic of the onboard chip and nearby the AGP slot for the add on card.
I removed the card to clean the fan (an artist's brush is perfect for the task).
After cleaning I reinstalled the card. This card is only slightly better than the onboard chip. Since the AGP slot is long since obsolete it is widely know the best cards for it are the HD 4670, the 9600 or the GeForce 4Ti. If I had to buy one the 4670 is still expensive but there are quite a few 9600 units around for good prices. Next step was on to the hard drive. Here's is a pic of the cage. It is held in place by a single thumbscrew.
Remove the thumbscrew and pull the cage up and out of the case.
I picked up a used Western Digital 160 GB drive (2009) on eBay for $15.74 with shipping.
The cage is built to hold two hard drives (the Primary and the Slave). There is a jumper to set the drive(s) but since I am only using one I just verified that it was set as the default master. I installed the drive in the cage with the connections up so when it is in place I can easily attach the cables. Note how the holes on the drive line up to the hole in the cage.
I placed the cage back into its position and prepared to attach the thumbscrew.
And then I attached the data ribbon cable and then the power cable.
After cleaning I reinstalled the card. This card is only slightly better than the onboard chip. Since the AGP slot is long since obsolete it is widely know the best cards for it are the HD 4670, the 9600 or the GeForce 4Ti. If I had to buy one the 4670 is still expensive but there are quite a few 9600 units around for good prices. Next step was on to the hard drive. Here's is a pic of the cage. It is held in place by a single thumbscrew.
Remove the thumbscrew and pull the cage up and out of the case.
I picked up a used Western Digital 160 GB drive (2009) on eBay for $15.74 with shipping.
The cage is built to hold two hard drives (the Primary and the Slave). There is a jumper to set the drive(s) but since I am only using one I just verified that it was set as the default master. I installed the drive in the cage with the connections up so when it is in place I can easily attach the cables. Note how the holes on the drive line up to the hole in the cage.
I placed the cage back into its position and prepared to attach the thumbscrew.
And then I attached the data ribbon cable and then the power cable.
Wednesday, November 19, 2014
Project: eMachines T-3256 restoration (4)
I let the alcohol dry overnight and now the cpu is ready to have the thermal paste applied.
The paste should only be applied to the cpu (the pink part) and should be no more than the thickness of a piece of paper. I applied it from the syringe and used the included wooden spreader to move it around, covering the cpu.
The heat sink only goes on one way (there is a notch on one side). I positioned it and clipped it into place. Just to be safe I removed the power supply so I could make sure the clips on both sides of the heat sink were correctly engaged.
I plugged in the fan connector to the power plug on the motherboard. I then hooked up the video connector (VGA) for the monitor to the connector on the video card as usually installing a video card in a machine with an on board video chip will override the on board chip. Finally I hooked up a USB keyboard and a USB mouse.
Next I connected the power cord to the power supply and then to the power strip.
There is no switch on the power supply so the only way to power up the machine is to use the power button on the front of the case. I pressed the button, it lit up, the cpu fan started running and the monitor came up with the 'e' but no indication of the key to press to access the bios. I tried the F2 (Dell's solution) but it failed.
A quick visit to Google (Tech Law #1: Google is your friend.) told me to try F2, Escape, Tab or Delete.
I tried Tab which failed and then Delete, which didn't.
Finally for today I hooked up the machine to my kill-a-watt EZ to measure the power being consumed and burn in the new paste on the cpu. After a couple of hours if was registering usage of $.28-.29 per day, but this is without a hard drive.
The paste should only be applied to the cpu (the pink part) and should be no more than the thickness of a piece of paper. I applied it from the syringe and used the included wooden spreader to move it around, covering the cpu.
I plugged in the fan connector to the power plug on the motherboard. I then hooked up the video connector (VGA) for the monitor to the connector on the video card as usually installing a video card in a machine with an on board video chip will override the on board chip. Finally I hooked up a USB keyboard and a USB mouse.
Next I connected the power cord to the power supply and then to the power strip.
There is no switch on the power supply so the only way to power up the machine is to use the power button on the front of the case. I pressed the button, it lit up, the cpu fan started running and the monitor came up with the 'e' but no indication of the key to press to access the bios. I tried the F2 (Dell's solution) but it failed.
A quick visit to Google (Tech Law #1: Google is your friend.) told me to try F2, Escape, Tab or Delete.
I tried Tab which failed and then Delete, which didn't.
Finally for today I hooked up the machine to my kill-a-watt EZ to measure the power being consumed and burn in the new paste on the cpu. After a couple of hours if was registering usage of $.28-.29 per day, but this is without a hard drive.
Monday, November 17, 2014
Project eMachines T-3256 restoration (3)
The heat sink was loose when I opened the case upon delivery. I am hoping that it came loose during transit, but the only way to find out is to test by booting. Before I do that I have to clean off the old thermal paste from the cpu and the bottom of the heat sink and clean out 10 years of dust from the fan and heat sink.
This is the cpu with the heat sink off. The old thermal paste is the "gunk" on top of the pink surface of the cpu.
This is the underside of the heat sink. There is a thin "pad" that covers around the cpu. I have to clean off the old paste from this surface also.
I removed the fan from the heat sink to expose 10 years of ultrafine dust/dirt that has been collected by the fan action inside the case. There is no easy or clean way to do this.
This is the cleaned cpu. I used q-tips saturated in isopropyl alcohol.
This is the cleaned heat sink and fan ready for reassembly.
This is the cpu with the heat sink off. The old thermal paste is the "gunk" on top of the pink surface of the cpu.
This is the underside of the heat sink. There is a thin "pad" that covers around the cpu. I have to clean off the old paste from this surface also.
I removed the fan from the heat sink to expose 10 years of ultrafine dust/dirt that has been collected by the fan action inside the case. There is no easy or clean way to do this.
This is the cleaned cpu. I used q-tips saturated in isopropyl alcohol.
This is the cleaned heat sink and fan ready for reassembly.
Subscribe to:
Posts (Atom)